Tuesday, 29 April 2014

Link to Website and the lighting shots

So finally i have published the website and it is now up and running, the website is still in progress and i will continue working on this as i make progress with my projects. Here is the link to the website for anyone who wishes to view it. http://peterknowles.weebly.com/. I have now re worked the lighting in the level to show the two other states within the section, both alarm lighting and the power cut sections.
Alarm Lighting


Power cut sections

Monday, 28 April 2014

Today's progress

So after working away throughout the day i have been working again on my website and within the axis game factory and i have some updates. First off is the work i have been doing inside of the axis game factory as of this morning i had a base map that i had created and just thrown some assets onto while i getting to know the software. But over the course of the day i have scrapped what i originally had and set about a start to actually creating a piece of work for my portfolio. While i was creating the map i have also created some more assets within the editor using the pieces that the software provides, creating these to build up the environment of my level. The assets are as follows.

Manor

Town Hall - Front


Town Hall - Side on view


The level is set on a small little island that is home to a little village that is shut of from the rest of the world. These images are the ones of the map in its original state when i began it earlier today.


The next images are the screenshots i have taken at the end of the work i have done towards it today. These aren't images of the final level as there is still alot i have to do towards it, this is just a stopping point for the day.
This is the overview of the Island as it currently stands


This is the player start and the lead up to the bridge into the village

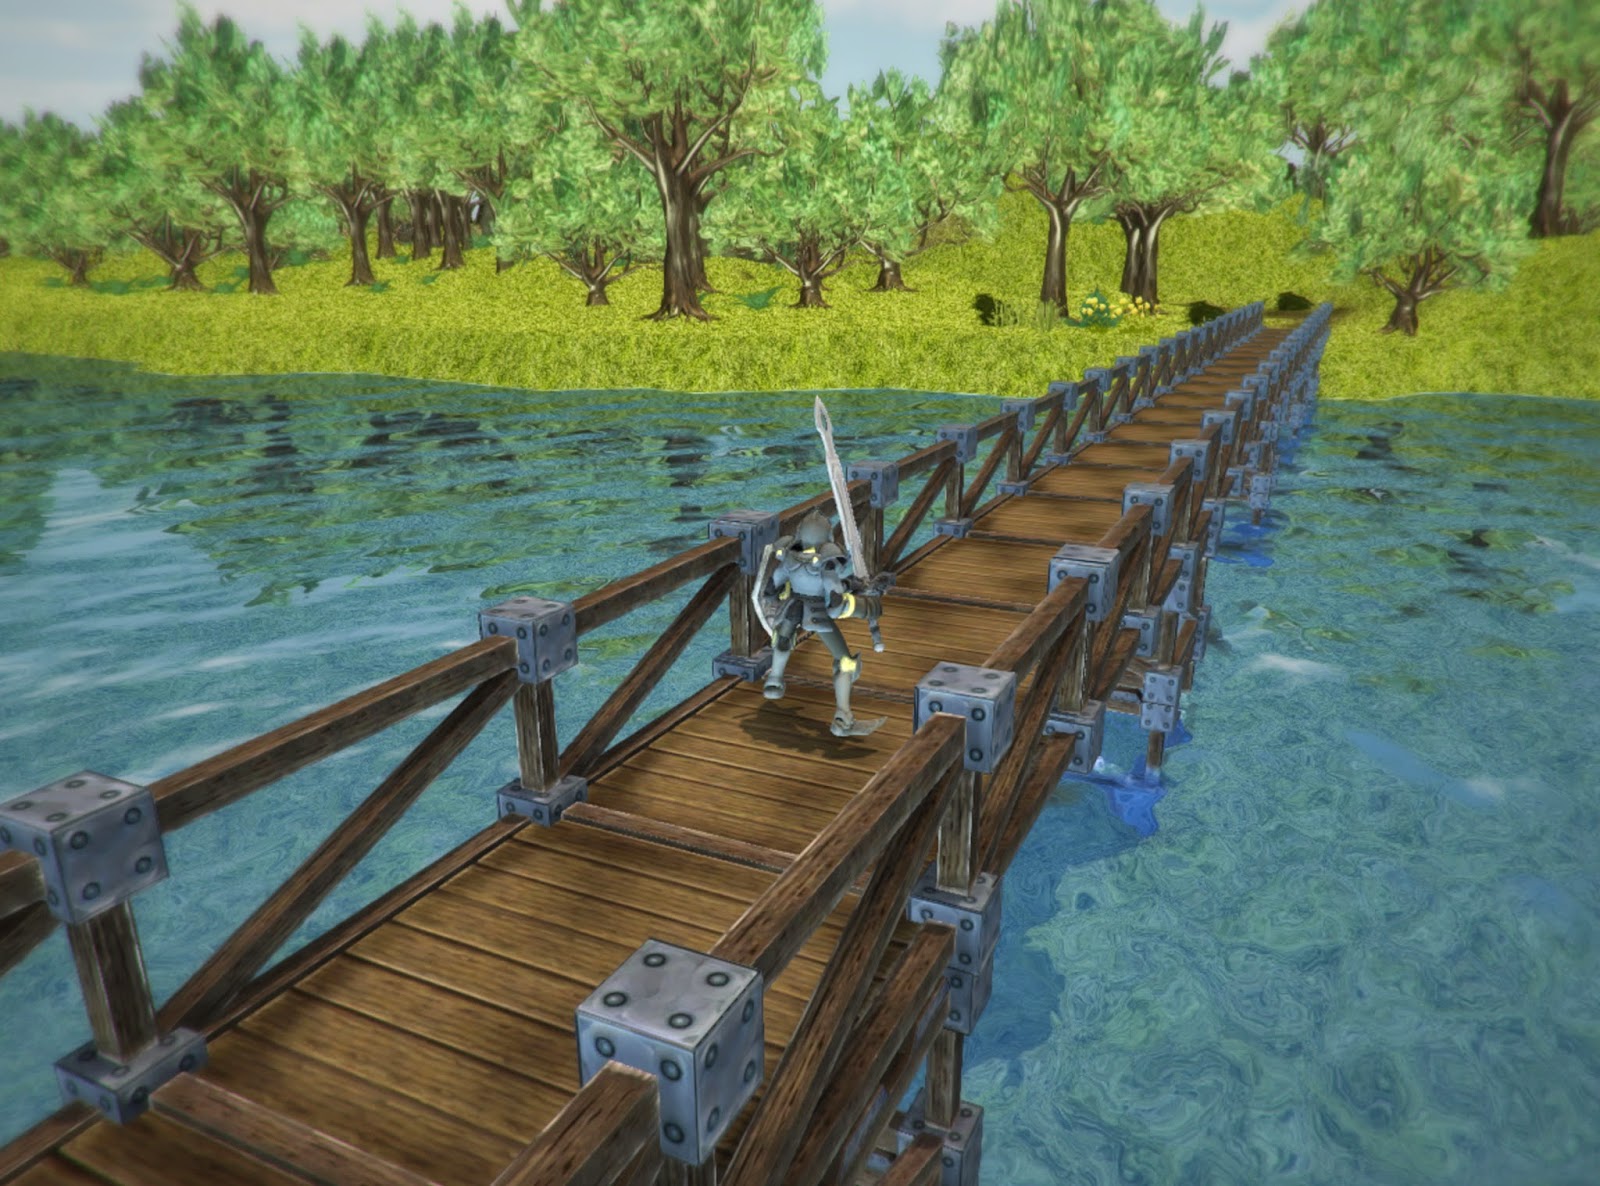
The bridge across the river to the village


The beginning of the path to the village

Further down the road to the village

A view of the road from a hill

Entrance to the village

The beginning of the outer edge of the village

The village's town hall


The assets in the village for the houses are just make shift ones that will be replaced when new ones are created to add a bit of variety to the town, there will also be things like roads and a town square of sorts in front of the town hall. Now onto the issue of the website, the website will be up and running after i finally figure out what i am going to do as a homepage and the last of the screenshots form my progress from today have been uploaded, it will be more than likely up and running by this time tomorrow and again a link will be posted to it. There will also be some screenshots of the prison cells with the alarm lighting on, i was hoping to have them ready to post with these but it is currently taking its time to bake the lighting for the scene so i will have to post these tomorrow with the link for the website.


Website,Lighting and New Software

So recently i have been working away on my website after letting it get away from me for so long, this has been where most of my time has been set getting that in order so that i will soon be able to publish it and add a link here. The website will however be up and running in the next few days. Anyways from that i have been testing lighting inside of my level in UDK, testing what the prison cells will look like once the lighting is added. Even though these assets are going to be remade i did this for the moment as a sort of place holder, so that without spending time going back and recreating the assets now and loose track of getting the rest of the level created, i could have the cells in there for demo purposes. Below are the images of the cell block with lighting. Today i will be making the lighting for the alarms and the power cut sections and i will upload my progress with that at a later time.


Now onto another thing that has been taking up alot of my time, recently i purchased the axis game factory and have been going about learning to use this. Im using this to create quick maps and levels for portfolio purposes, it is also giving me practice with terrain creation which will help when it comes to later points in the project when i need to create the levels on land.  I have only had the software over the last few days and haven't really gotten that far into building a level as i am still finding my way around the tools and the program. The images below are what i have created so far. I will also be working on this some more throughout the day and will upload my progress at a later point.

House 1

Back of the house

Variant 1

Variant 2

Sunday, 13 April 2014

Cell Block Door Section

With the new wall completed I moved onto creating the new door section for the entrance to the holding cells, so far i have started to create the door section and have created the doors. I have also began to texture the pillar as i take breaks from modelling and have unwrapped the uv map for the wall to begin texturing once i finish texturing the pillar.

With the door i have placed lights into it, which on the image below appear to be blue, these will as glow green and red, but instead of online and offline like before with the assets in the cell blocks the lights will glow green for when the door is open and can be passed through and red for when the door is locked. I will also create a standard unlit texture that will be able to be applied to it so that in the sections where the power is off none of the lights will be on.

With the door section i kept it in the same style as the wall section to give it that seem-less fit. The door section will have a panel on the right side of it so the player can use it to get into the cells. This will be created separately because this will have and animated texture on it.


The image below is how the asset will look when combined with the other wall asset to build up the corridor, once the textures are complete i will post the updated version of the assets and scene.

Friday, 11 April 2014

Getting back to things.

I have recently picked back up on the project after working away on a few other things on the side and on coming back to the project i saw some things that needed changing. The first was the walls as i could not find out what was causing there to be a problem with the mesh when it came to lighting i decided to make a new model and model it to a higher poly count and add some extra detail to it just to give it that extra little visual boost. While i have been working on other things i have picked up a few tricks along the way so the textures will be changing between the two models which is what i am currently working away on.


Another thing i have cam back and changed was the pillar, after making it i didnt really think that it fit in with the rest of the assets so again i decided to go back in and remake this, again to a higher poly count to give it that little bit extra. With it i took away the bridged part across the top linking the two pillars and just created it to fit snugly with the roof asset that i went on to create. 


The last thing that i have worked on as just mentioned was the roof asset, this like the floor peices will be created a few times over with variations for where needed, mainly following the shape of the floor beneath it, i have created the main section first and have worked away texturing this, trying my hand at bump mapping and am beginning to look into other sources of mapping. The texture that is now on the asset isnt the final version of the texture as i will at some point be going back into this and editing it so that the there is damage added to it, this will happen for all of the assets adding both damage and wear and tear. 


I have also re-edited all of the floor pieces to now include the lights on the sides as they were on the original model, the main section of the flooring. I will be now replacing these inside of the editor and begin starting to build the corridors of the level as i continue working on the textures and rest of the assets for the level.

Sunday, 23 February 2014

Update

Over the last few weeks I have been creating extra assets for the level, these being another few extra floor pieces to give the levels aesthetics another little boost making different ones for the various positions that they were going to be in such editing them but generally keeping the same style of them so that I can keep and overall look and feel to the section.  Alongside creating these I have been working away on concept art for the level, sketching out both plans for the rest of the section and ideas for weapons and characters etc. I will be uploading these soon once I have scanned them onto the computer, after which I will be going into Photoshop and adding extra details to them there.

Floor pieces
I have created all of the floor pieces I will need to create basic corridors within the level, I may at a later stage decided to create specific sections if the need arises but for now the ones I have made will be used for the flooring. I have create a few floor pieces these being the straight section, a corner section, a cross section for joining with rooms and doorways or simply a cross section of corridors and I have also created a T-junction section for the same purpose. I have been working away on getting them texture, all with the same colour pallet and including small lights in them all to give it that sci-fi feel.

Straight Piece


Corner Piece


Cross section


Junction


Main wall


I have also textured the wall, I have encountered a problem with the wall when it has come to texturing it as the texture looks fine when it is inside 3DS Max and when it is rendered in there but once it is placed into UDK and the lighting is turned on there is a problem with shadows on the mesh, so I will be going back to look into this problem further in the near future.


This is what the corridor looks like when it is placed together. There are still some parts missing that i am currently on working on, but this is the basic look of what the corridor will look like.


Sunday, 29 December 2013

Back to modeling

So with all of the basic game play, events and cameras for the cut-scenes and quick-time events set up inside of the cell blocks, i have decided to go back to modeling the rest of the assets for the cell blocks, thus making it so that i can finish them off and add lighting to the scene, as well add more minor events into the section to do with these and add these to some of the current cut-scenes where i have them planned.

Firstly on my to do list for modeling is the main bulk of the walls and floors for these sections just so that i can bulk it out a little and make it look a little more impressive than just standard blue and white squares that make up the BSP walls that are currently in place. So i created a list of what i needed to create to make up the corridors. That list being: The walls themselves, i will need to create two versions of these however as with the floor due to the sections were the cell block doors are. The floors, pillars to go with the walls, the roof, a door for entrance into the main corridor which leads to each of the cell blocks as well as a wall for this to fit into and the lights that will be placed onto the ceiling.

So far i have created  the mid section wall, the mid section floor piece and the pillar model and am beginning to texture the floor model first trying to keep to the same colour pallet, look and feel as the one that i had created for the cell block itself.

Main Floor

For the main floor of the corridor i decided to stick with the same sort of style as the flooring inside of the cell blocks themselves, only this time i have put some extra detail and decided to begin creating the high poly assets instead of just creating the simple low poly ones. This floor piece is bigger than the cell block one due to the extra room in the corridor giving me some extra room to play with. So with this being a high poly assets i decided that i would model a hole for grates to be created and placed into instead of just texturing them on, thus making it look better once inside of the engine, i also included lights into the floor to give it more of a sci-fi feel and to add to the aesthetics of the level inside it and especially inside the sections where the lights are flickering or totally out due to the sections without power that i have implemented into the level. The blueish parts on the model show below is where the lights are these will be emissive texture once i load all of the texture inside of the engine and add the textures inside of there.

(Below rendered image of the floor piece and below that is the asset inside of the software)


Pillars

I created the pillars so that the corridor had a bit of depth to them and so that they didn't just look plain, bland and desolate. The pillars were there for another source of light in the sections where there was no power to the lighting, with these lights being emissive textures again like the ones in the flooring. These lights will change colours inside of the level like the status bars on the cell block walls, when the power cuts out of an alarm is sounded these will change to red as a sort of visual warning for the player.

(Below rendered image of the Pillar and below that is the asset inside of the software)


Wall piece

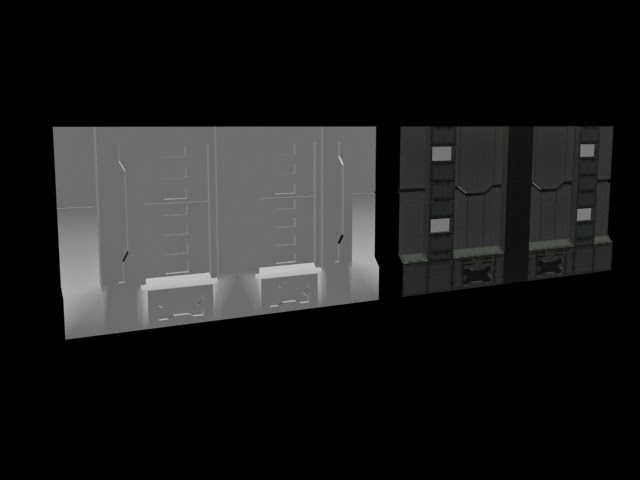
With the walls there will be a number of different section/ asset pieces to make up the full piece due to the various parts of the room, such as a different wall piece will need to be created for both of the door types that are going to be within the corridor, one being those that lead into the cell blocks themselves and the other being the one that leads into the actual corridor. The section that i however have created to begin with is the piece that will tile to fit in-between the door way sections. Again with this model i ave included the light panels and also the missing grates/panels to be created separately  and added in later to make the model look just that little bit better.

(Below rendered image of the Wall section and below that is the asset inside of the software)


All of these models are currently un-textured but i am currently working away to create textures from them wanting to get the textures done for these and have them placed inside of the engine to form a base for the corridor before i move onto modelling any of the other assets to complete the section. I will shortly post the finished textured models up upon completion of them.